点群データの平面推定_part2
やること
- 平面の導出
- RANSACの勉強
前回の記事
平面の推定(Open3d)
前回は、Point Cloudから最小二乗法を使って平面を推定した
今回は、Open3Dを使う
Point Cloudの処理は、Point Cloud Library(PCL)が有名ですが最近python利用者はOpen3Dを使う人が増えています
pipで簡単にインストールできますが、私の場合少しはまったのでその時の経験は過去の記事にあります。
では、Open3Dを使った平面推定を行います。
import numpy as np
import open3d as o3d
import matplotlib.pyplot as plt
from mpl_toolkits.mplot3d import Axes3D
import math
%matplotlib inline
# 係数 (ax + by + cz + d = 0)
A = 0; B = 0; C = -1; D = 1

points = []
for x in np.arange(0, 10, 0.5):
  for y in np.arange(0, 10, 0.5):
    for z in np.arange(0, 10, 0.5):
      if(abs(A*x + B*y + C*z + D) < 1e-8):
        points.append([x, y, z])
points = np.asarray(points).T

pcd = o3d.geometry.PointCloud()
pcd.points = o3d.utility.Vector3dVector(points.T)

plane_model, inliers = pcd.segment_plane(distance_threshold=0.01,
                                             ransac_n=3,
                                             num_iterations=250)
[a, b, c, d] = plane_model
print(f"Plane model: {a:.2f}x + {b:.2f}y + {c:.2f}z + {d:.2f} = 0")


fig = plt.figure()
ax = Axes3D(fig)
ax.set_xlabel("X")
ax.set_ylabel("Y")
ax.set_zlabel("Z")

ax.scatter3D(points[0],points[1],points[2])

plt.show()
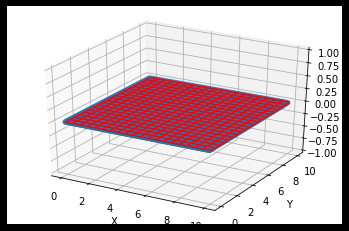
出力結果 (Ax + By + z + C = 0)
Plane model: 0.00x + 0.00y + 1.00z + -1.00 = 0
ちなみにopen3Dのsegment_planeはRANSACの処理が入っているため、ノイズにも強い
点群データの平面推定_part1
やること
- 平面の導出
- RANSACの勉強
平面の導出
平面の方程式
既知の点
を通る平面の方程式を求める
平面上の任意の点
とすると、平面上のベクトル
と平面の法線ベクトル
は直交するため、次式を得る
したがって、平面の方程式は、
となる。ここで、
とすると、平面の方程式は
で表される。
下準備(平面上のPoint Cloud生成)
まずは、理想的な平面のPoint Cloudデータを作成する
先ほどの面の方程式より面のPoint Cloudデータを作る
import numpy as np
import matplotlib.pyplot as plt
from mpl_toolkits.mplot3d import Axes3D
%matplotlib inline
# 法線ベクトル及びオフセット値
A = 0.0; B = 0.0; C = 1.0; D = -1.0
# point cloud 作成
points = []
for x in np.arange(0, 10, 0.1):
  for y in np.arange(0, 10, 0.1):
    for z in np.arange(0, 10, 0.1):
      if(A*x + B*y + C*z + D ==0):
        points.append([x, y, z])
points = np.asarray(points).T
points = np.asarray(points).T
# グラフ表示
fig = plt.figure()
ax = fig.add_subplot(111, projection = '3d')
ax.set_xlabel("X")
ax.set_ylabel("Y")
ax.set_zlabel("Z")
ax.plot(points[0],points[1],points[2])
plt.show()

平面推定
最小二乗法を使って平面を求めます
平面の方程式を以下のように変形します
先ほど作った点群が、すべて平面上にあると考えると、平面の方程式より以下の式が成り立つ

ここで、方程式を変形する
上記の式はの形で考えられる。ただし、
は非正方行列である。したがって、

とすることで、が求まる。
ただし、
が逆行列を持つ(正則)ことが条件である。
points = points.T
vecB = -points[:,2]
points[:,2] = 1

dim = np.dot(points.T, points)
vec = np.dot(points.T, vecB)
ans = np.dot(np.linalg.inv(dim), vec)

d = -(ans[0]*points[0,0] + ans[1]*points[0,1] + ans[2]*points[0,2])

print(dim)
print(vec)
print("A, B, C =", ans)
output
[[328350. 245025.  49500.]
 [245025. 328350.  49500.]
 [ 49500.  49500.  10000.]]
[49500. 49500. 10000.]
A, B, C = [4.4408921e-16 0.0000000e+00 1.0000000e+00]
points = points.T
A = ans[0]; B = ans[1]; C = ans[2]
xmesh, ymesh = np.meshgrid(np.linspace(0, 10, 20),
                            np.linspace(0, 10, 20))
zmesh = (C + A * xmesh.ravel() +
        B * ymesh.ravel()).reshape(xmesh.shape)

fig = plt.figure()
ax = fig.add_subplot(111, projection = '3d')
ax.set_xlabel("X")
ax.set_ylabel("Y")
ax.set_zlabel("Z")

ax.scatter(points[0],points[1],points[2])
ax.plot_wireframe(xmesh, ymesh, zmesh, color='r')

plt.show()

open3dのインストールではまったこと
やること
pythonでopen3dをインストールすること
open3dとは?
pythonでPoint Cloudを扱うのに便利なアプリケーション
最近話題なので使ってみようと思います。
はまったこと
- wsl ubuntu16.04LTSでopen3dをインストールするとsegmentation faultが起きる
- wsl ubuntu16.04LTSでopen3dをインストールするとAttribute errorが出る
google colabratoryではpip install open3dでOKでした
手順
ここからは作業メモになります。
pipでインストールが上手くいかなかったので、makeしようと思います。
git clone --recursive https://github.com/intel-isl/Open3D
~/Open3D/util/scripts/install-deps-ubuntu.sh
コンパイルに必要なモジュールがインストールされる
cd ~/Open3d
mkdir builld
cd build
cmake ..
make -j$(nproc)
make install-pip-package
最後のmakeの出力結果
[  1%] Built target EncodeShader
[  1%] Built target ShaderFileTarget
[  5%] Built target ext_turbojpeg
Custom target build_all_3rd_party_libs reached.
[  5%] Built target build_all_3rd_party_libs
[ 20%] Built target Visualization
[ 27%] Built target qhullstatic_r
[ 29%] Built target tinyobjloader
[ 39%] Built target qhullcpp
[ 41%] Built target jsoncpp
[ 43%] Built target tinyfiledialogs
[ 44%] Built target Camera
[ 46%] Built target ColorMap
[ 60%] Built target Geometry
[ 62%] Built target Integration
[ 63%] Built target Odometry
[ 67%] Built target Registration
[ 70%] Built target Utility
[ 84%] Built target IO
[ 86%] Built target Open3D
[100%] Built target open3d
Scanning dependencies of target python-package
[100%] Built target python-package
Scanning dependencies of target pip-package
running bdist_wheel
running build
running build_py
creating build
creating build/lib
creating build/lib/open3d
copying open3d/__init__.py -> build/lib/open3d
copying open3d/j_visualizer.py -> build/lib/open3d
running egg_info
creating open3d.egg-info
writing dependency_links to open3d.egg-info/dependency_links.txt
writing open3d.egg-info/PKG-INFO
writing top-level names to open3d.egg-info/top_level.txt
writing requirements to open3d.egg-info/requires.txt
writing manifest file 'open3d.egg-info/SOURCES.txt'
reading manifest file 'open3d.egg-info/SOURCES.txt'
reading manifest template 'MANIFEST.in'
warning: no files found matching 'open3d/open3d*.pyd'
warning: no files found matching 'open3d/*depthengine*'
warning: no files found matching 'open3d/*k4a*'
warning: no files found matching 'open3d/*libstdc*'
warning: no files found matching '*.*' under directory 'open3d/static'
warning: no previously-included files matching '*.py[co]' found anywhere in distribution
writing manifest file 'open3d.egg-info/SOURCES.txt'
copying open3d/open3d.cpython-35m-x86_64-linux-gnu.so -> build/lib/open3d
installing to build/bdist.linux-x86_64/wheel
running install
running install_lib
creating build/bdist.linux-x86_64
creating build/bdist.linux-x86_64/wheel
creating build/bdist.linux-x86_64/wheel/open3d-0.9.0.0.data
creating build/bdist.linux-x86_64/wheel/open3d-0.9.0.0.data/purelib
creating build/bdist.linux-x86_64/wheel/open3d-0.9.0.0.data/purelib/open3d
copying build/lib/open3d/__init__.py -> build/bdist.linux-x86_64/wheel/open3d-0.9.0.0.data/purelib/open3d
copying build/lib/open3d/j_visualizer.py -> build/bdist.linux-x86_64/wheel/open3d-0.9.0.0.data/purelib/open3d
copying build/lib/open3d/open3d.cpython-35m-x86_64-linux-gnu.so -> build/bdist.linux-x86_64/wheel/open3d-0.9.0.0.data/purelib/open3d
running install_data
creating build/bdist.linux-x86_64/wheel/open3d-0.9.0.0.data/data
creating build/bdist.linux-x86_64/wheel/open3d-0.9.0.0.data/data/share
creating build/bdist.linux-x86_64/wheel/open3d-0.9.0.0.data/data/share/jupyter
creating build/bdist.linux-x86_64/wheel/open3d-0.9.0.0.data/data/share/jupyter/nbextensions
creating build/bdist.linux-x86_64/wheel/open3d-0.9.0.0.data/data/share/jupyter/nbextensions/open3d
creating build/bdist.linux-x86_64/wheel/open3d-0.9.0.0.data/data/etc
creating build/bdist.linux-x86_64/wheel/open3d-0.9.0.0.data/data/etc/jupyter
creating build/bdist.linux-x86_64/wheel/open3d-0.9.0.0.data/data/etc/jupyter/nbconfig
creating build/bdist.linux-x86_64/wheel/open3d-0.9.0.0.data/data/etc/jupyter/nbconfig/notebook.d
copying enable_jupyter_extension.json -> build/bdist.linux-x86_64/wheel/open3d-0.9.0.0.data/data/etc/jupyter/nbconfig/notebook.d
running install_egg_info
Copying open3d.egg-info to build/bdist.linux-x86_64/wheel/open3d-0.9.0.0.data/purelib/open3d-0.9.0.0-py3.5.egg-info
running install_scripts
creating build/bdist.linux-x86_64/wheel/open3d-0.9.0.0.dist-info/WHEEL
pip wheel created at /home/shosuke/Open3D/build/lib/python_package/pip_package
[100%] Built target pip-package
Scanning dependencies of target install-pip-package
[100%] Built target install-pip-package
makeが完了し、インストールが終わったように見える。
確認のため以下のコマンドを実行する。
python3 -c "import open3d"
Traceback (most recent call last):
  File "<string>", line 1, in <module>
ImportError: No module named 'open3d'
インストールできてない?ビルドは成功してそうなのに。。。
とにかく動かしたいので、強硬手段!!
pip3 show pip
でアプリケーションがどこに保存されるか確認し、/usr/lib/python3/dist-packages
/にあることが判明。
また、~/Open3D/build/lib/Pythonにopen3d.cpython-35m-x86_64-linux-gnu.soといういかにもビルド結果っぽいものを発見。
コピーして直接入れたら使えるのでは??
(pipで管理されないのであんまりよくないと思うけど。。。)
で、コピーしてみました。
すると、、、
python3 -c "import open3d"
を入力して無事に終了しました!
案の定、pip3 list | grep open3dを入力しても出てきませんでした。
~/Open3D/examples/Python/Basic/file_io.pyを実行してみると
Testing IO for point cloud ...
Format = auto
Extension = pcd
geometry::PointCloud with 113662 points.
Testing IO for meshes ...
geometry::TriangleMesh with 1440 points and 2880 triangles.
Testing IO for textured meshes ...
geometry::TriangleMesh with 8 points and 12 triangles, and textures of size (320, 320)
geometry::TriangleMesh with 8 points and 12 triangles, and textures of size (320, 320)
Testing IO for images ...
Image of size 512x512, with 3 channels.
Use numpy.asarray to access buffer data.
無事に実行できました。
prime wardrobe初体験
内容
本日は雑談です。 私事ですが、先日靴を買いました。初めてprime wardrobeを使ったのでその体験を書きます。
なぜ利用したか
私は優柔不断なところがあり、本当に欲しいと思わないと靴を思い切って買うことができません。
なので、いつもはいろんな店舗をうろうろして、最終的に最初の店舗で買うとうこともしばしばあります。
結局最初の店舗で買うなら、時間を無駄にしたなーと思うこともありました。
でも、ネットで買うとサイズミスとか好みじゃなかったとか失敗しいた経験もあり、靴だけは絶対に実店舗で買っていました。
そんななか、最近prime wardrobeを知りました。
これは、amazonで服を買うときに1週間試着することができるものです。
コロナで出歩くのもよくないし、使ってみようかなーと思いやってみました。
体験談
amazonでwardrobeに対応している靴を3足選び注文すると以下のように段ボールが届きました。
いつもと違う段ボールです。

段ボールの中に靴が3足入っており、それらを試着して購入するものを選びます。
やはり、靴は履いてみないとわからないことがありますね。3足中2足はサイズが小さく、失敗しました。そのため、購入する1足を決め、amazonの購入履歴から処理を行いました。
2足を返送するのですが、これがまた少し感動しました!
送られてきたダンボールを使って、再度返送することができます。段ボールがそういう仕様の造り込みがされていました。開けるときは、びりびりと引っ張れば開くタイプで、なんで少しオーバーラップしてるのかなと思っていたのですが、そのオーバーラップ部分には両面テープが貼られており、返送するときにそれをはがして封ができるようになってました。(写真を撮るの忘れた。。。)<\sub>
結果、返送するときに手間がほぼ0だったのと、通販ならではの失敗も回避でき大満足の体験でした。
以上、雑談でした。
gazebo rvizで躓いたところ
やること
Gazeboの起動 Rvizの起動
手順
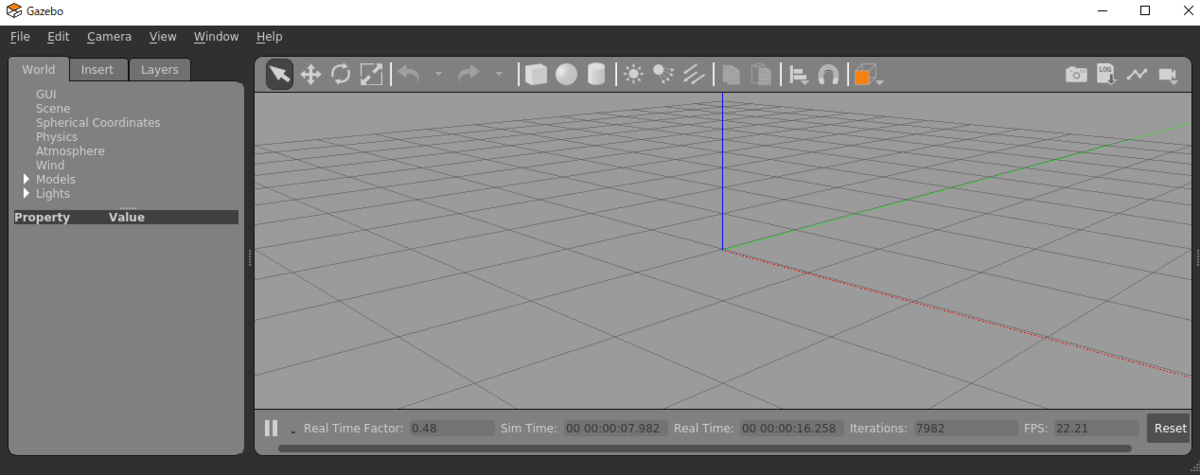
Gazeboを起動
gazebo
出力結果
libGL error: No matching fbConfigs or visuals found
libGL error: failed to load driver: swrast
libGL error: No matching fbConfigs or visuals found
libGL error: failed to load driver: swrast
VcXsrvの設定を変更
Extra settingでAdditional parameters for VcXsrvに-nowglを追加
再度gazebo起動
shared memfd open() failed: Function not implemented
ALSA lib confmisc.c:767:(parse_card) cannot find card '0'
ALSA lib conf.c:4528:(_snd_config_evaluate) function snd_func_card_driver returned error: No such file or directory
ALSA lib confmisc.c:392:(snd_func_concat) error evaluating strings
ALSA lib conf.c:4528:(_snd_config_evaluate) function snd_func_concat returned error: No such file or directory
ALSA lib confmisc.c:1246:(snd_func_refer) error evaluating name
ALSA lib conf.c:4528:(_snd_config_evaluate) function snd_func_refer returned error: No such file or directory
ALSA lib conf.c:5007:(snd_config_expand) Evaluate error: No such file or directory
ALSA lib pcm.c:2495:(snd_pcm_open_noupdate) Unknown PCM default
AL lib: (EE) ALCplaybackAlsa_open: Could not open playback device 'default': No such file or directory
[Err] [REST.cc:205] Error in REST request
なんかエラーっぽいのが出てるけど一応成功

rvizを起動
roscore
でrosを立ち上げてから、ctl+zで一度抜ける
rosrun rviz rviz
を入力すると

起動しました。
wslでROS1のsetup(melodic)
やること
ROS1のセットアップ ubuntu18.04LSTのインストール (やった作業のメモになります。解説は一切ないです。)
手順
ubuntuのインストールは過去の記事を参照にしてください。 ROS1のバージョンをmelodicでインストールしようとしましたが、ubuntu16.04LSTではkineticしか出てこなかったです。
参考:http://wiki.ros.org/melodic/Installation/Ubuntu
実行1
sudo sh -c 'echo "deb http://packages.ros.org/ros/ubuntu $(lsb_release -sc) main" > /etc/apt/sources.list.d/ros-latest.list'
実行2
sudo apt-key adv --keyserver 'hkp://keyserver.ubuntu.com:80' --recv-key C1CF6E31E6BADE8868B172B4F42ED6FBAB17C654
実行3
curl -sSL 'http://keyserver.ubuntu.com/pks/lookup?op=get&search=0xC1CF6E31E6BADE8868B172B4F42ED6FBAB17C654' | sudo apt-key add -
実行4
sudo apt update
以下の結果(ROS関連のlog)が出るとOK
Get:1 http://packages.ros.org/ros/ubuntu bionic InRelease [4669 B]
Hit:2 http://archive.ubuntu.com/ubuntu bionic InRelease
Hit:3 http://archive.ubuntu.com/ubuntu bionic-updates InRelease
Hit:4 http://security.ubuntu.com/ubuntu bionic-security InRelease
Hit:5 http://archive.ubuntu.com/ubuntu bionic-backports InRelease
Get:6 http://packages.ros.org/ros/ubuntu bionic/main amd64 Packages [635 kB]
Fetched 640 kB in 12s (52.4 kB/s)
Reading package lists... Done
Building dependency tree
Reading state information... Done
All packages are up to date.
実行5
sudo apt install ros-melodic-desktop-full
実行6
sudo apt install python-rosinstall python-rosinstall-generator python-wstool build-essential python-catkin-tools
実行7
echo "source /opt/ros/melodic/setup.bash" >> ~/.bashrc
source ~/.bashrc
実行8
source /opt/ros/melodic/setup.bash
実行9(前にaptしたときはpython-rosdepを忘れてた)
sudo apt install python-rosdep python-rosinstall python-rosinstall-generator python-wstool build-essential
実行10
sudo rosdep init
rosdep update
実行結果(エラーが出た)
reading in sources list data from /etc/ros/rosdep/sources.list.d
Hit https://raw.githubusercontent.com/ros/rosdistro/master/rosdep/osx-homebrew.yaml
Hit https://raw.githubusercontent.com/ros/rosdistro/master/rosdep/base.yaml
Hit https://raw.githubusercontent.com/ros/rosdistro/master/rosdep/python.yaml
Hit https://raw.githubusercontent.com/ros/rosdistro/master/rosdep/ruby.yaml
Hit https://raw.githubusercontent.com/ros/rosdistro/master/releases/fuerte.yaml
Query rosdistro index https://raw.githubusercontent.com/ros/rosdistro/master/index-v4.yaml
ERROR: error loading sources list:
        <urlopen error <urlopen error [Errno -3] Temporary failure in name resolution> (https://raw.githubusercontent.com/ros/rosdistro/master/index-v4.yaml)>
もう一回rosdep updateを実行
reading in sources list data from /etc/ros/rosdep/sources.list.d
Hit https://raw.githubusercontent.com/ros/rosdistro/master/rosdep/osx-homebrew.yaml
Hit https://raw.githubusercontent.com/ros/rosdistro/master/rosdep/base.yaml
Hit https://raw.githubusercontent.com/ros/rosdistro/master/rosdep/python.yaml
Hit https://raw.githubusercontent.com/ros/rosdistro/master/rosdep/ruby.yaml
Hit https://raw.githubusercontent.com/ros/rosdistro/master/releases/fuerte.yaml
Query rosdistro index https://raw.githubusercontent.com/ros/rosdistro/master/index-v4.yaml
Skip end-of-life distro "ardent"
Skip end-of-life distro "bouncy"
Skip end-of-life distro "crystal"
Add distro "dashing"
Add distro "eloquent"
Add distro "foxy"
Skip end-of-life distro "groovy"
Skip end-of-life distro "hydro"
Skip end-of-life distro "indigo"
Skip end-of-life distro "jade"
Add distro "kinetic"
Skip end-of-life distro "lunar"
Add distro "melodic"
Add distro "noetic"
ERROR: error loading sources list:
        <urlopen error <urlopen error [Errno -3] Temporary failure in name resolution> (https://raw.githubusercontent.com/ros/rosdistro/master/noetic/distribution.yaml)>
がでた。
sudo vim /usr/lib/python2.7/dist-packages/rosdep2/gbpdistro_support.py
で、DOWNLOAD_TIMEOUT=45.0に変更
reading in sources list data from /etc/ros/rosdep/sources.list.d
Hit https://raw.githubusercontent.com/ros/rosdistro/master/rosdep/osx-homebrew.yaml
Hit https://raw.githubusercontent.com/ros/rosdistro/master/rosdep/base.yaml
Hit https://raw.githubusercontent.com/ros/rosdistro/master/rosdep/python.yaml
Hit https://raw.githubusercontent.com/ros/rosdistro/master/rosdep/ruby.yaml
Hit https://raw.githubusercontent.com/ros/rosdistro/master/releases/fuerte.yaml
Query rosdistro index https://raw.githubusercontent.com/ros/rosdistro/master/index-v4.yaml
Skip end-of-life distro "ardent"
Skip end-of-life distro "bouncy"
Skip end-of-life distro "crystal"
Add distro "dashing"
Add distro "eloquent"
Add distro "foxy"
Skip end-of-life distro "groovy"
Skip end-of-life distro "hydro"
Skip end-of-life distro "indigo"
Skip end-of-life distro "jade"
Add distro "kinetic"
Skip end-of-life distro "lunar"
Add distro "melodic"
Add distro "noetic"
updated cache in /home/USERNAME/.ros/rosdep/sources.cache
成功したのかな?
実行11
echo "source /opt/ros/melodic/setup.bash" >> ~/.bashrc
echo "source `catkin locate --shell-verbs`" >> ~/.bashrc
source ~/.bashrc
実行12
mkdir -p ~/catkin_ws/src
cd ~/catkin_ws/src
catkin_init_workspace
cd ~/catkin_ws
catkin_make
echo "source ~/catkin_ws/devel/setup.bash" >> ~/.bashrc
source ~/.bashrc
実行13
roscore
結果
... logging to xxxxxxxxxxxxxxxxxx.log
Checking log directory for disk usage. This may take a while.
Press Ctrl-C to interrupt
Done checking log file disk usage. Usage is <1GB.

started roslaunch server http://xxxxxxxxxxxxxx/
ros_comm version 1.14.5


SUMMARY
========

PARAMETERS
 * /rosdistro: melodic
 * /rosversion: 1.14.5

NODES
・・・・・・
とりあえずroscore立ち上がったのでインストール成功?
opencvで多角形画像の作成
やること
cv2.fillConvexPoly()を使って多角形画像を塗りつぶす
なぜか
semantic segmentationやinstance segmentationの出力結果は画像で出す場合もあれば、ポリゴンの頂点情報のみの場合もある。
頂点情報の場合、直感的にわかりにくいので画像で出力するほうがよい。
そのため、頂点のリストを結んで塗りつぶす方法をメモしておきたい。
コード
import numpy as np
import cv2
import matplotlib.pyplot as plt
% matplotlib inline
USIZE = 256
VSIZE = 256
CHANEL = 3
MAXHEIGHT = 50
MAXWIDTH = 50

def makeImage():
  image = np.zeros((256, 256, 3))
  boxnum = 5
  for j in range(5):
    node = []
    for i in range(boxnum):
      sx = np.random.randint(0, USIZE-MAXWIDTH)
      sy = np.random.randint(0, USIZE-MAXHEIGHT)
      node.append([sx, sy])
    node = np.asarray(node)
    color_b = np.random.randint(0, 255)
    color_g = np.random.randint(0, 255)
    color_r = np.random.randint(0, 255)
    image = cv2.fillConvexPoly(image, points=node, color=(color_b, color_g, color_r))
  image = image.astype(np.uint8)
  plt.figure()
  plt.imshow(image)

makeImage()
出力結果

よく書き間違える部分
cv2.fillConvexPoly()に渡すpointはnumpyの配列であること。
for i in range(boxnum):
      sx = np.random.randint(0, USIZE-MAXWIDTH)
      sy = np.random.randint(0, USIZE-MAXHEIGHT)
      node.append([sx, sy])
node = np.asarray(node)